Backing up your Wordpress / WooCommerce data on Fenritec Drive is a simple and effective way to ensure that your data and that of your customers remain in the European Union protected by the R.G.P.D.
This also ensures that you are able to restore your site in the event of a hack or loss of data.
Prerequisites
- A Fenritec Drive account
- A Wordpress / WooCommerce website
- The plugin Updraft Webdav 11.50 €
Note
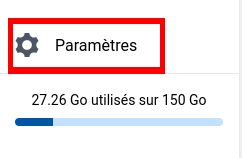
For daily backup and storage for several months, it is recommended to use a Fenritec Drive 150 GB subscription.
Steps
Step 1: Download UpDraft Plus from official website
Download the Wordpress Updraft plugin and save it on your computer: https://updraftplus.com/wp-content/uploads/updraftplus.zip
Step 2: Install the plugin on your Wordpress
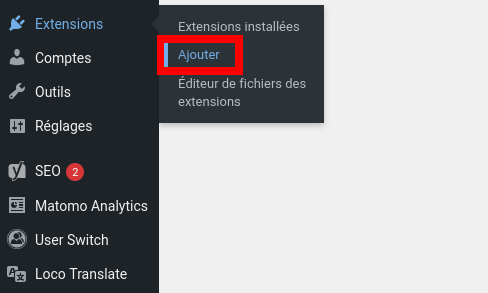
Log in to your Wordpress administration panel and click in the side menu on “Extensions” -> “Add”.
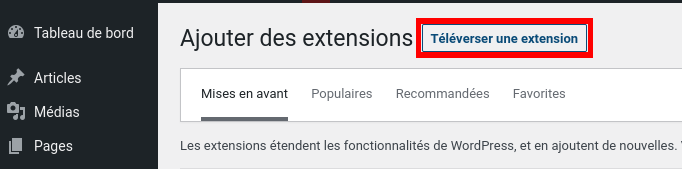
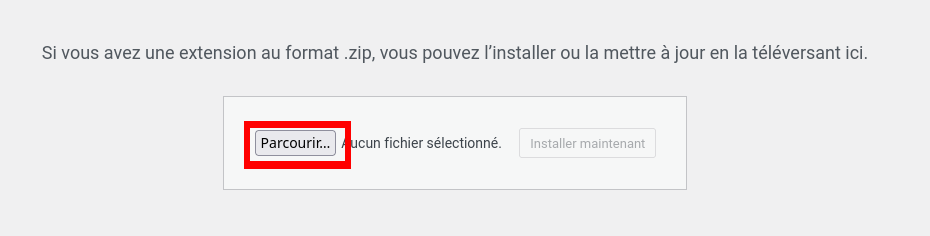
Click on “Upload” an extension then “Browse” and select the previously downloaded plugin in the file explorer.
Click “Install Now”.
Finally activate the plugin by going in the side menu to “Extensions” -> “Installed Extensions”. Then clicking on activate below “UpdraftPlus - Backup / Restore”

Step 3: Activate WebDAV Subscription for Updraft Plus
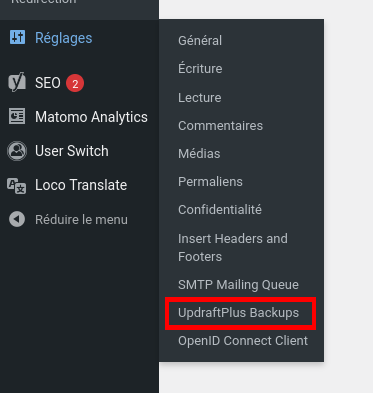
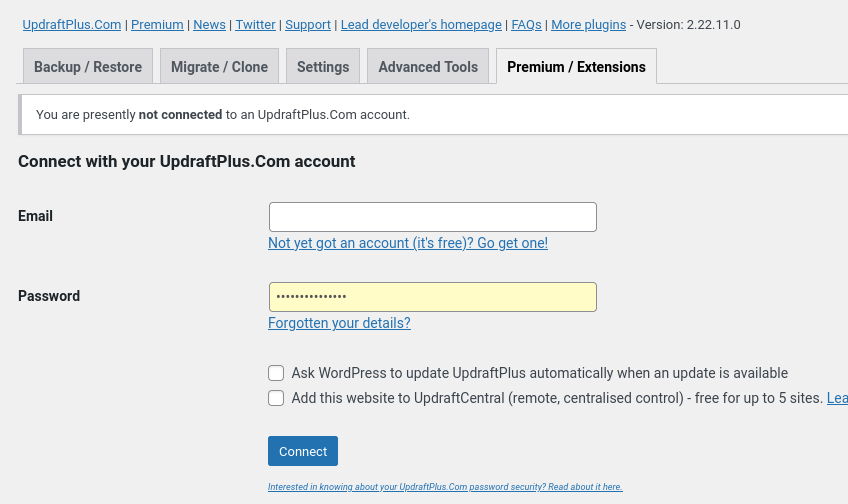
Go in the side menu to “Settings” -> “UpdraftPlus Backups”.
Then click on the “Premium / Extensions” tab and authenticate.
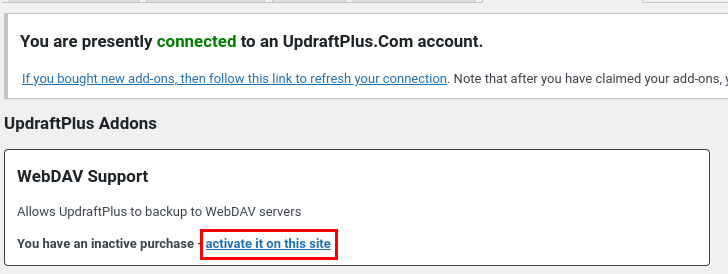
Finally activate WebDAV support by clicking on “activate it on this site”.
Step 4: Set up Fenritec Drive
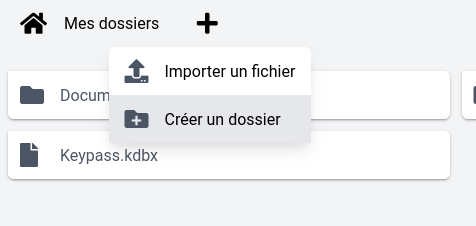
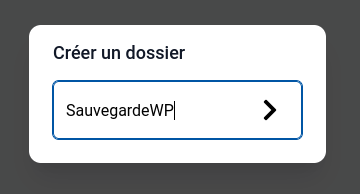
Connect to your Drive and create your backup folder. Here we called it “BackupWP”.
Then click “Setting” to configure WebDAV.
Enter the indicative name for the new access key and click on the side arrow. Here we have chosen Wordpress.
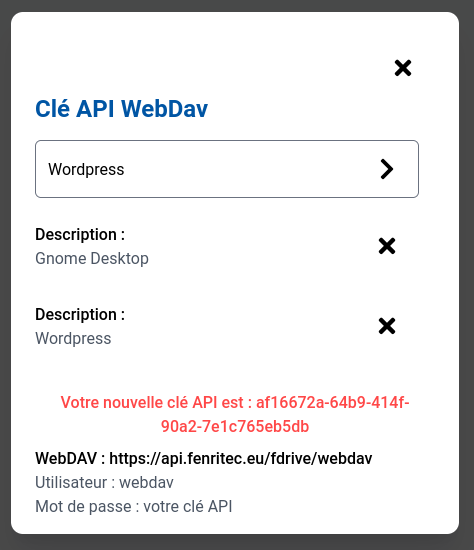
Write down your API key, it is your WebDAV password.
Step 5: Configure Updraft Plus
Go in the side menu to “Settings” -> “UpdraftPlus Backups”.
Then click on the “Settings” tab and click on WebDAV.
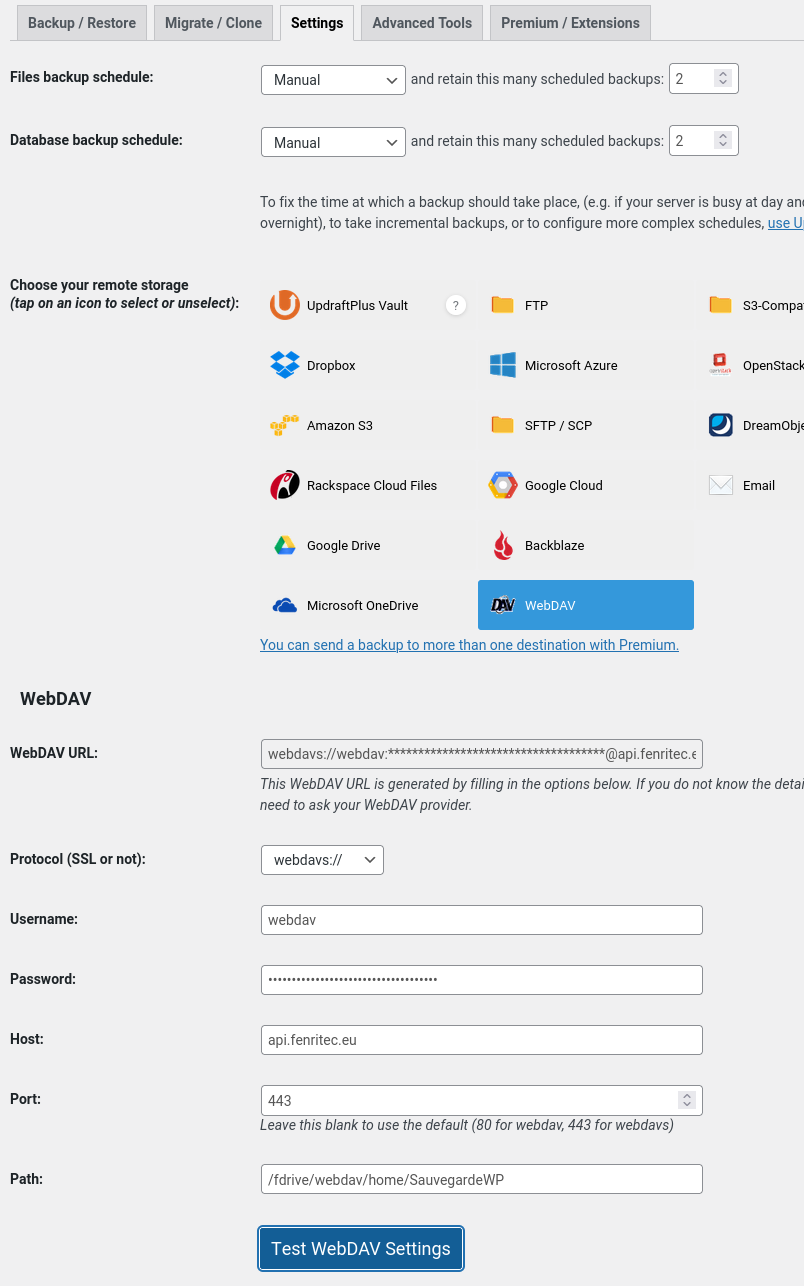
Choose the following options:
- Protocol: webdavs
- Username: webdav
- Password: Your API key in step 4
- Host: api.fenritec.eu
- Port: 443
- Path: /fdrive/webdav/home/{ path of your folder } (here /fdrive/webdav/home/SauvegardeWP)
Click on Test WebDAV Settings you should have a “Success”. Finally click on “Save Changes” at the bottom.
Step 6: Create a backup to test
Select the “Backup / Restore” tab.

Click “Backup Now”.

Click “Backup Now”.
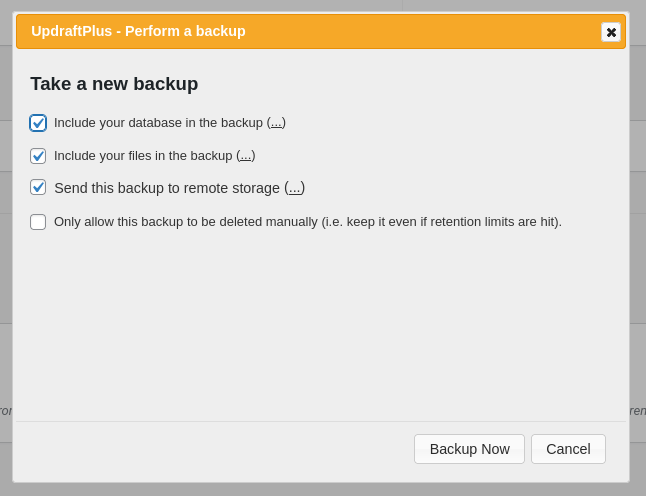
A progress bar should appear.
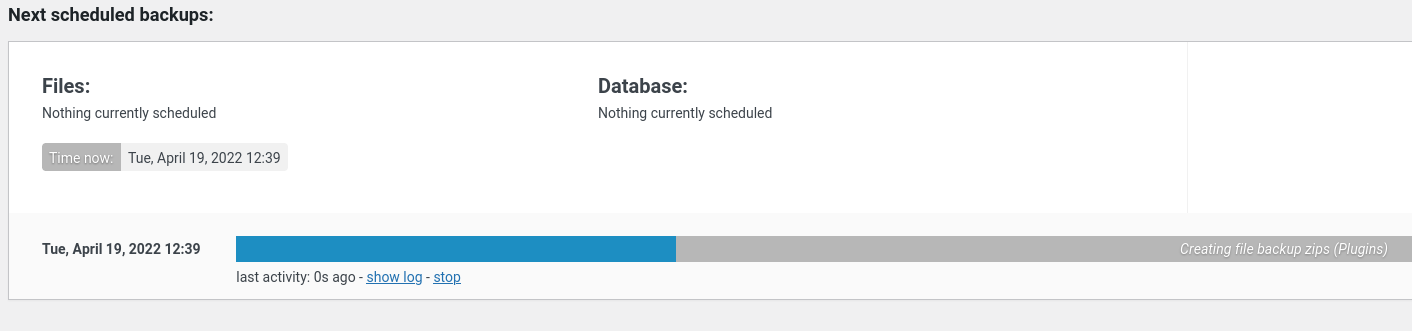
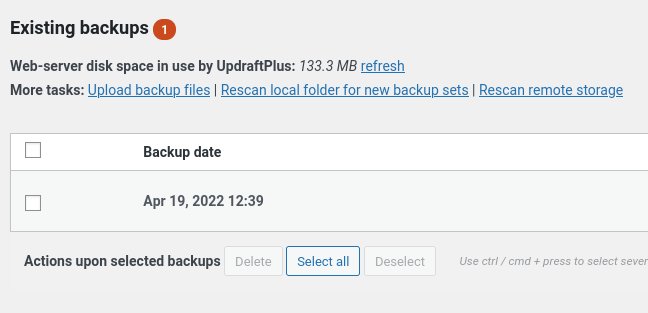
At the end of the progress, your backup appears in the “Existing backups” list.
Step 7: Verify Backup Accuracy
This step is essential to ensure that you can restore your site in the event of a force majeure event. Updraft Plus will attempt to download your backup and verify the signature on it.
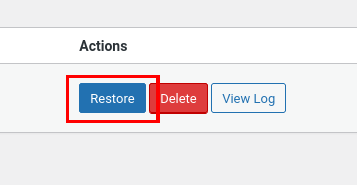
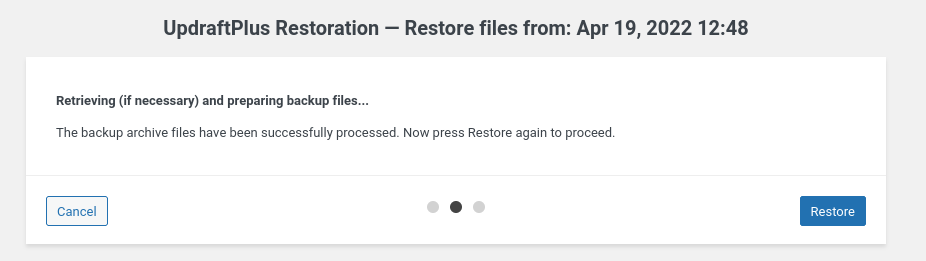
In the “Existing backups” list, click on “Restore”.
Select all the options then click “Next”.
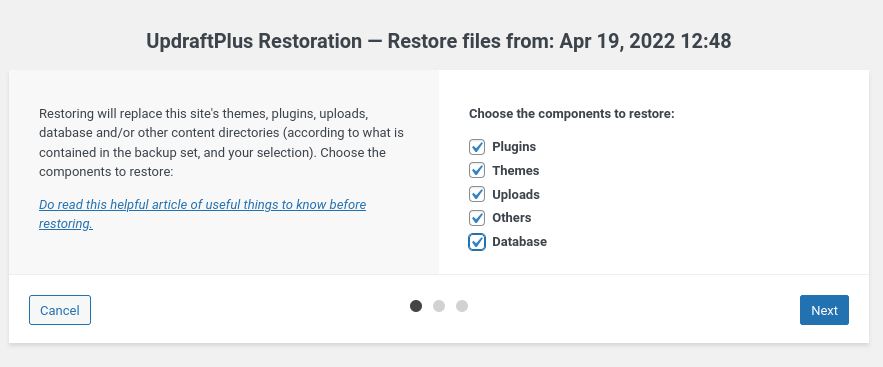
You should get the message “The backup archive files have been successfully processed.” if all is good.
Conclusion
Your Wordpress / WooCommerce site is now well backed up. You can also set up an automatic backup if needed.
For any additional questions, you can contact Fenritec support.